Drop of a hat, these guys will rock and roll.
‒ Vincent Hanna in Heat (1995)
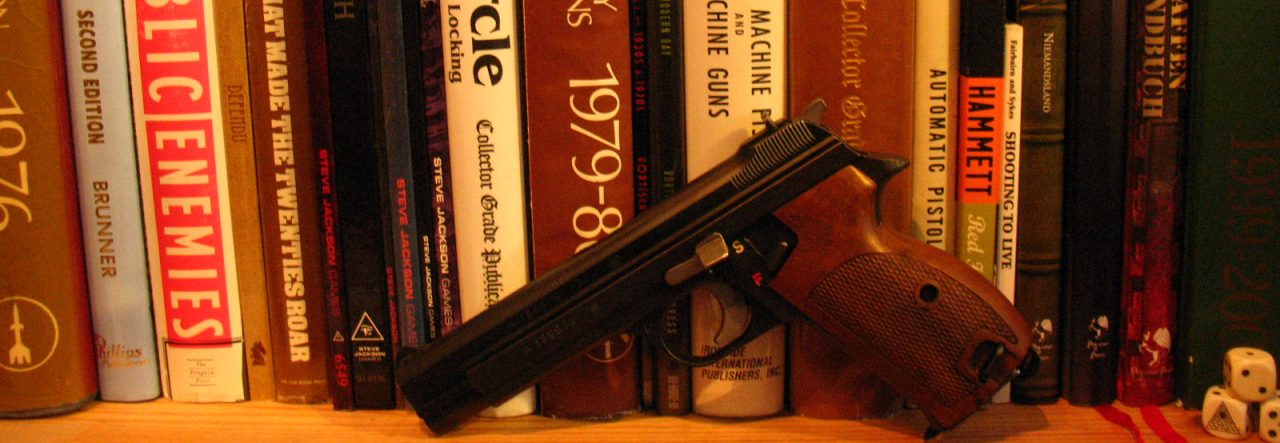
Michael Mann’s Heat (1995) was one of the most important inspirations for GURPS Tactical Shooting. The epic intertwined story of a gang of bank robbers and the LAPD detectives hunting them has everything that makes a film great ‒ compelling story, great actors, articulate dialogue, awesome action, perfect music, cool props. Both the bank robbers led by Neil McCauley (Robert De Niro) and the police detectives led by Lieutenant Vincent Hanna (Al Pacino) display believable gun handling, with many scenes being excellent.
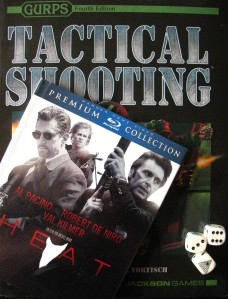
There are several high-profile gunfights in this motion picture, the most famous being of course the massive shootout in downtown Los Angeles. Although less spectacular, the gunfight in the Centinela drive-in theatre is also very interesting, since it showcases firing at and from moving cars. Here I examine how that would play out in GURPS. Watch just the scene here (the action starts at 0:39).
Stop reading if you want to avoid SPOILERS.
Round per Round
Prelude: Neil McCauley meets with Bad Guy #1 in the deserted Centinela drive-in, both sitting in their cars, parked side-by-side, facing into the same direction. McCauley, an investigator (GURPS Action 1: Heroes, pp. 12-13) adept in the Assaulter shooting style (Tactical Shooting, pp. 47-48), is at the wheel of an inconspicuous work car, a 1986 Buick Electra Estate wagon (ST/HP 64, Move 4/56, LWt. 2.5 tons, SM +3, DR 3) parked on the left. Bad Guy #1 sits in a glitzy white 1994 Dodge Ram 3500 pickup truck (ST/HP 76, Move 5/75, LWt. 6 tons, SM +3, DR 3) parked on the right. While they talk through their open windows, Bad Guy #2, previously concealed in the truck bed, sneaks out and is now located between the two cars in McCauley’s blind spot. He holds a Steyr TMP submachine gun (GURPS High-Tech, p. 126) in 9×19mm Parabellum in his right hand. Bad Guy #2 is at the height of the rear wheel of the Electra when he is spotted just in time by McCauley’s associate Chris Shiherlis, who is on over-watch lying prone on a low building about 45 m (50 yards) to the front of the cars. Shiherlis radios McCauley: “Behind you, on the right!”
1st Second: At his turn, Shiherlis takes a Move manoeuvre and rolls to the right out of his concealed position, taking with him his H&K HK91A2 semiautomatic rifle (High-Tech, p. 116) in 7.62×51mm NATO resting on a bipod (High-Tech, p. 160) in front of him. At his turn, McCauley takes a Move and Attack manoeuvre and puts the Electra into reverse, at the same time hitting the gas (Move 1) and steering to the right to slam (p. B371) Bad Guy #2 in a side-on collision (p. B432). McCauley makes his Driving (Car) roll (p. B470) and Bad Guy #2 fails his Dodge roll. As the Electra lurches to the rear, Bad Guy #2 is pinned between the two cars, taking (64 × 1 / 100 = 0.64) 1d-1 cr (average 3 points) collision damage (p. B430); McCauley’s attack roll has to be a critical as Bad Guy #2’s right arm is crippled despite taking less damage than HP/2 (pp. B420-421). He drops his gun (p. B421), which dangles supported by a one-point sling (Tactical Shooting, p. 71). The car takes only (10 × 1 / 100 = 0.1) 1d-3 cr collision damage. Bad Guy #2 takes twice the damage or more than the car, but he does not fall down (despite p. B371). Bad Guy #2 is shocked (p. B419). At his turn, Bad Guy #1 takes a Do Nothing manoeuvre, being mentally stunned (p. B393). At his turn, Bad Guy #2 takes a Do Nothing manoeuvre, being mentally stunned.
2nd Second: At his turn, Shiherlis takes Change Posture manoeuvre and gets into kneeling position. At his turn, McCauley takes a Move and Attack manoeuvre and continues to slam Bad Guy #2 with the car (Move 5). McCauley makes his Driving (Car) roll and Bad Guy #2 fails his Dodge roll. Bad Guy #2 takes (64 × 5 / 100 = 3.2) 3d cr (average 11 points) collision damage. His left leg is crippled but he makes his HT roll to avoid knockdown and stunning. The car takes only (10 × 5 / 100 = 0.5) 1d-1 cr collision damage. Bad Guy #2 takes twice the damage or more, but he does not fall down. He also manages to ignore the crippled leg (p. B421). At his turn, Bad Guy #1 is still stunned. At his turn, Bad Guy #2 is at 0 HP or less and makes his HT roll to avoid falling unconscious. He takes a Do Nothing manoeuvre, being shocked.
3rd Second: Shiherlis takes a Change Posture manoeuvre and stands up. McCauley takes a Move manoeuvre and drives in reverse (Move 9). Bad Guy #1 takes a Do Nothing manoeuvre, still stunned. He makes his IQ roll to snap out of his stun, being able to act on his next turn. Bad Guy #2 takes a Move manoeuvre at halved Move and hops on one leg towards the truck bed.
4th Second: Shiherlis takes an All-Out Attack (Determined) manoeuvre and fires one sighted shot (Tactical Shooting, p. 13) from his rifle through the windshield (Tactical Shooting, p. 30) of the Ram at Bad Guy #1; -8 (range) -3 (large glass window hit location) +1 (All-Out Attack) -1 (heavy bullet through windshield) = -11 to Guns (Rifle). Although he fires downwards (p. B407), the height difference is not enough to matter. Shiherlis hits the windshield and Bad Guy #1 has no active defence since he is unaware of the attack (p. B374). The 6d+2 pi shot penetrates the windshield (DR 3). On the Occupant Hit Table (p. B555), a penetrating hit strikes a single occupant in a SM +3 vehicle on an 8 or less; the shot misses Bad Guy #1. Note that windscreen stars usually do not render a modern windscreen opaque (despite p. B469), including in this scene. McCauley takes a Ready manoeuvre and draws his H&K USP pistol (High-Tech, p. 102) in 9×19mm Parabellum with his right hand); taking off the safety is free action (High-Tech, p. 80). He continues to steer the Electra backwards (Move 9) with his left hand. Bad Guy #1 takes a Move manoeuvre and drives the Ram forwards (Move 5), abandoning Bad Guy #2. Bad Guy #2 takes a Move manoeuvre and changes facing to turn towards the Electra.
5th Second: Shiherlis takes an All-Out Attack (Determined) manoeuvre and fires two sighted shots from his rifle at Bad Guy #1; -8 (speed/range) +1 (All-Out Attack) -3 (large glass window hit location) -1 (heavy bullet through windshield) = -11 to Guns (Rifle). Both shots hit the windshield but miss Bad Guy #1 inside. McCauley takes a Move manoeuvre and brakes (Move 4). Bad Guy #1 takes a Move manoeuvre and drives forwards towards the exit (Move 10). Bad Guy #2 takes a Ready manoeuvre and brings his submachine gun up with his off hand.
6th Second: Shiherlis takes a Do Nothing manoeuvre. McCauley takes a Move manoeuvre and brakes to a stop (Move 0), then changes gears. Bad Guy #1 takes a Move manoeuvre and drives forwards towards the exit (Move 15). Bad Guy #2 takes a Ready manoeuvre and tightens the sling of his submachine gun for a slightly better shooting stance (Tactical Shooting, pp. 12, 13). With the sling, MinST becomes 8 × 1.2 = 10 instead of 12.
7th Second: Shiherlis takes an All-Out Attack (Determined) manoeuvre and swivels to the right, firing two sighted shots from his rifle at Bad Guy #1 as the car passes his position; -7 (speed/range) +1 (All-Out Attack) -3 (large glass window hit location) = -9 to Guns (Rifle). Both shots hit the car but fail to hit Bad Guy #1. McCauley takes a Move and Attack manoeuvre and drives forward towards Bad Guy #2 (Move 4), firing one one-handed unsighted shot from his pistol through the windshield at Bad Guy #2 while driving (pp. B469-470) towards him (Move 8); -7 (range) -4 (ground vehicle on the move, off road) -2 (Move and Attack) -2 (light bullet through windshield) = -15 to Guns (Pistol). McCauley’s shot misses. Bad Guy #1 takes a Move manoeuvre and drives forwards towards the exit (Move 20). Bad Guy #2 takes an Attack manoeuvre and fires a one-handed unsighted (Tactical Shooting, p. 13) 15-round burst from his submachine gun at the Electra; -7 (speed/range) +3 (size) -4 (off-hand) +3 (rate of fire) = -5 to Guns (SMG). Bad Guy #2 scores at least one hit on the car and McCauley fails his active defence roll; (Driving (Car)/2) + 0 (Hnd) (p. B470). Bad Guy #2 rolls on the Vehicle Hit Location Table (p. B554) and scores a Body hit, which takes no further effect.
8th Second: Shiherlis takes an All-Out Attack (Determined) manoeuvre and swivels to the right, firing two sighted shots from his rifle at Bad Guy #1 as the car passes his position; -7 (speed/range) +1 (All-Out Attack) -3 (large glass window hit location) = -9 to Guns (Rifle). Both shots hit the car but fail to hit Bad Guy #1. McCauley takes a Move and Attack manoeuvre and fires one one-handed unsighted shot from his pistol at Bad Guy #2 while driving towards him (Move 12); -6 (range) -4 (ground vehicle on the move, off road) -2 (Move and Attack) -2 (light bullet through windshield) = -14 to Guns (Pistol). McCauley’s shot misses. Bad Guy #1 takes a Move manoeuvre and drives forwards towards the exit (Move 25). Bad Guy #2 takes a Ready manoeuvre to align the gun up again.
9th Second: Shiherlis, hearing the SMG burst, takes a Move manoeuvre and turns around to change facing. McCauley takes a Move and Attack manoeuvre and fires one one-handed unsighted shot from his pistol at Bad Guy #2 while driving towards him (Move 16); -4 (range) -4 (ground vehicle on the move, off road) -2 (Move and Attack) -2 (light bullet through windshield) = -12 to Guns (Pistol). McCauley’s shot misses. Bad Guy #1 takes a Move manoeuvre and drives forwards towards the exit (Move 30). Bad Guy #2 takes an Attack manoeuvre and fires a one-handed unsighted 15-round burst from his submachine gun at McCauley; -6 (speed/range) +3 (size) -4 (off-hand) +3 (rate of fire) = -4 to Guns (SMG). Bad Guy #2’s attack misses.
10th Second: Shiherlis takes an Aim manoeuvre and aims his rifle at Bad Guy #2. . McCauley takes a Move manoeuvre and drives towards Bad Guy #2 (Move 20). Bad Guy #1 takes a Move manoeuvre and drives forwards towards the exit (Move 30). Bad Guy #2 takes a Ready manoeuvre, not realizing he is out of ammunition.
11th Second: Shiherlis takes an All-Out Attack (Determined) manoeuvre and shoots one aimed shot (Tactical Shooting, p. 14) at the back of Bad Guy #2; -8 (range) +1 (All-Out Attack) +5 (Acc) = -2 to Guns (Rifle). Shiherlis’ shot hits Bad Guy #2, who fails his defence roll; halved (0 HP and less) Dodge. He is hit in the torso with 6d+2 pi (average 23 points) damage and spins around facing McCauley’s car. He is at -1×HP or less and forced to make a HT roll to avoid knockdown and stunning and a HT roll to avoid instant death; he succeeds with both. McCauley takes a Move and Attack manoeuvre and shoots one shot at Bad Guy #2 (Move 24); -2 (speed/range) -4 (ground vehicle on the move, off road) -2 (Move and Attack) -2 (light bullet through windshield) = -10 to Guns (Pistol). McCauley hits Bad Guy #2, who fails his defence; halved (-1×HP or less) Dodge. He is hit in the torso with 2d+2 pi (average 9 points) damage after penetrating the DR 3 windshield and spins around facing away from the car. He is at -1×HP or less and shocked, as well as forced to make a HT roll to avoid knockdown and stunning and a HT roll to avoid instant death; he succeeds with both. Bad Guy #1 takes a Move manoeuvre, but does not accelerate any more (Move 30). Bad Guy #2 takes a Do Nothing manoeuvre.
12th Second: Shiherlis takes a Do Nothing manoeuvre. McCauley takes a Move and Attack manoeuvre and slams into Bad Guy #2 in a head-on collision (Move 28); Driving (Car). He slams into Bad Guy #2, who fails his Dodge roll; -4 (shock). Bad Guy #2 takes (64 × 28 / 100 = 17.9) 18d cr (average 63 points) collision damage and goes over the hood. He is at -5×HP or less and instantly dead. The car takes (10 × 28 / 100 = 2.8) 3d cr collision damage. Bad Guy #1 takes a Move manoeuvre, but does not accelerate any more (Move 30).
13th Second: Shiherlis and McCauley take Do Nothing manoeuvres, or at least we do not see any longer what they do. Bad Guy #1 takes a Move manoeuvre and has almost reached the exit (Move 30). Michael Cheritto takes an All-Out Attack (Determined) manoeuvre and steps out of concealment near the exit, firing two sighted shots from his Benelli M3 Super 90 dual-mode shotgun (High-Tech, p. 106) in 12-gauge 3” at the windshield of the Ram; -8 (speed/range) +1 (All-Out Attack) -3 (large glass window hit location) -2 (light bullet through windshield) +4 (2 × 9 = 18 pellets) = -8 to Guns (Shotgun). Both shots hit the windshield (DR 3) and penetrate inside, but miss Bad Guy #1.
14th Second: Bad Guy #1 takes a Move manoeuvre (Move 30). Cheritto takes an All-Out Attack (Determined) manoeuvre and fires two sighted shots at the windshield of the Ram; -7 (speed/range) +1 (All-Out Attack) -3 (large glass window hit location) -2 (light bullet through windshield) +4 (2 × 9 = 18 pellets) = -7 to Guns (Shotgun). Both shots miss the intended target, one hitting the right rear-view mirror, the other the door. The latter is at least partially penetrated (DR 3) but Bad Guy #1 is not hit.
15th Second: Bad Guy #1 takes a Move manoeuvre (Move 30) and drives the car through the exit. Cheritto takes an All-Out Attack (Determined) manoeuvre and fires two sighted shots at Bad Guy #1 through the passenger window; -6 (speed/range) +1 (All-Out Attack) -3 (large glass window hit location) +4 (2 × 9 = 18 pellets) = -4 to Guns (Shotgun). The attack hits and Bad Guy #1 fails his defence roll. Pellets from both shots penetrate the side window (DR 1) and several pellets strike Bad Guy #1 for several times 1d+1 pi. Bad Guy #1 is at 0 HP or less; he fails his HT roll and falls unconscious.
16th Second: Now driverless, the car continues and comes to a stop by crashing into a low wall.
In the film, the scene is 60 seconds long, as it cuts between showing the various characters, although much of the action evolves simultaneously.
Results
Shooting at something while travelling in a moving car is difficult, especially if it is a rough ride. Doing so while steering a car is extremely difficult. No surprise, really, but once again the rules align with truth and fiction.
The odds of hitting the occupant of a car are small, if you rely on the Occupant Hit Table (p. B555). Game-mechanically, it makes more sense to shoot at a specific occupant and soak up the -1 penalty (p. B470). However, hitting the sitting torso (at -2 for partial coverage, p. B408) or head (-5 or worse due to hit location) of a car occupant is much more difficult than hitting a big car. Furthermore, occupants are often difficult to see clearly in a vehicle, and a shot through a window often suffers further penalties (Tactical Shooting, p. 30). Realistically, most shooters do not shoot at occupants but at the vehicle, and the poor results usually mirror this scene.
